Formatting Photos for Instagram in 2026
Most clients invest in my professional photography services for, at the least, posting on Instagram. Whether you’re a couple sharing your wedding day, an indie band promoting a new album, or an actor refreshing your headshots, everybody is up against constantly shifting social media platforms.
I’ve spent years navigating the technical aspects of Instagram so you don’t have to. Here is how to ensure your photo investment looks as intended!
1. Best Ratios for Instagram
Ideally, your photos should take up as much of the screen as possible! Any smaller and your audience might doomscroll right past your post.
The New IG Standard (3:4 | 1080px x 1440px): This is the taller modern portrait ratio. It fills the phone screen and perfectly matches the new rectangular profile grids.
Stories & Reels (9:16 | 1080px x 1920px): Aim for this for full-screen immersion.
Other ratios are accepted by Instagram, but they may crop the borders.
2. High-Res vs. Compression
My native deliverables from Sony a7IV are massive (typically 7008px x 4672 px, unless cropped). While these are large enough to print on a billboard, Instagram will automatically scale them down.
By default, I provide images in 3:2 (Landscape) and 2:3 (Portrait). These are the professional standard in photography. If you want to fine-tune the dimensions, adjustments can manually be made in your preferred editor such as Lightroom, Photoshop or a smartphone’s native photo app.
3. The Carousel
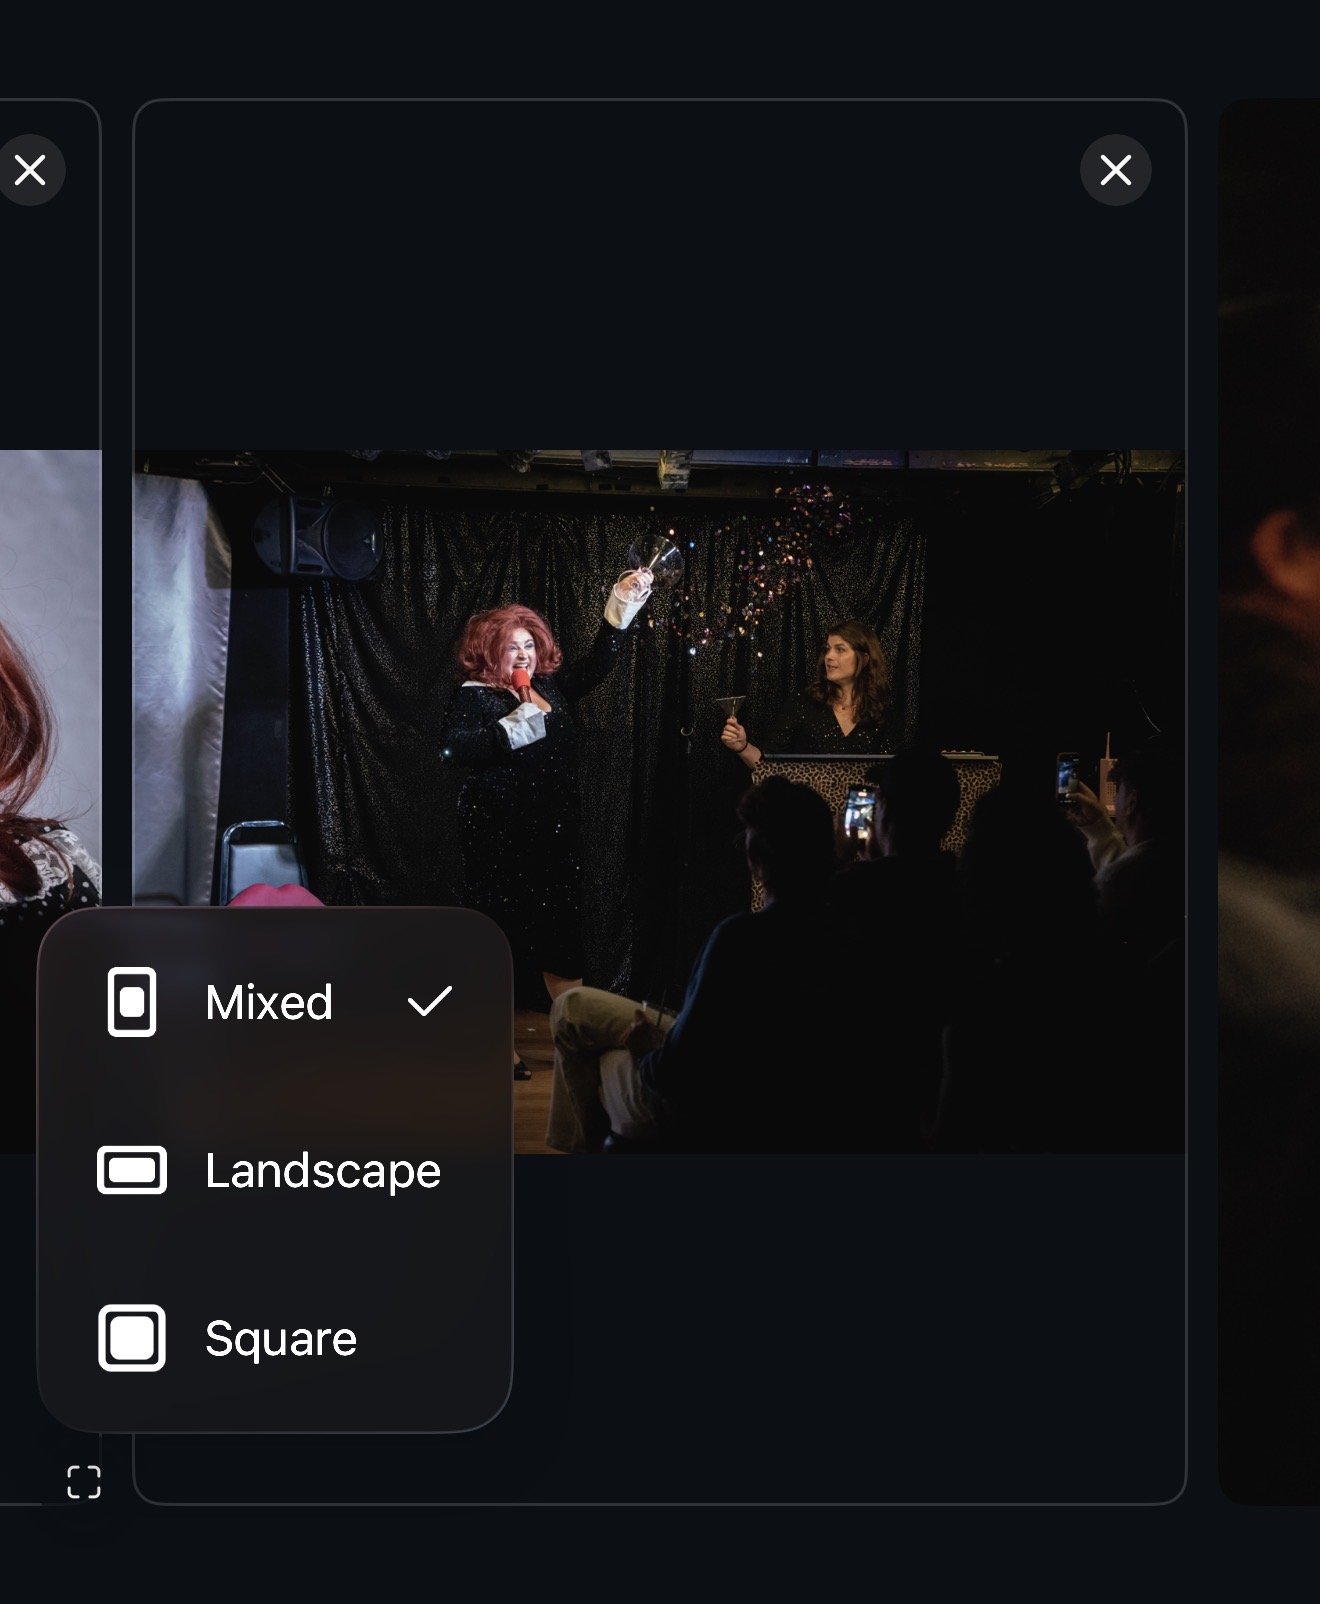
I often see clients attempting to mix landscape (horizontal) with portrait (vertical) images in a carousel but IG automatically crops them to match the first image. There’s an easy fix!
The "Mix" Button: After selecting multiple images, look for the Mixed icon (see below). This allows you to mix ratios within a single post without that awkward "forced crop."
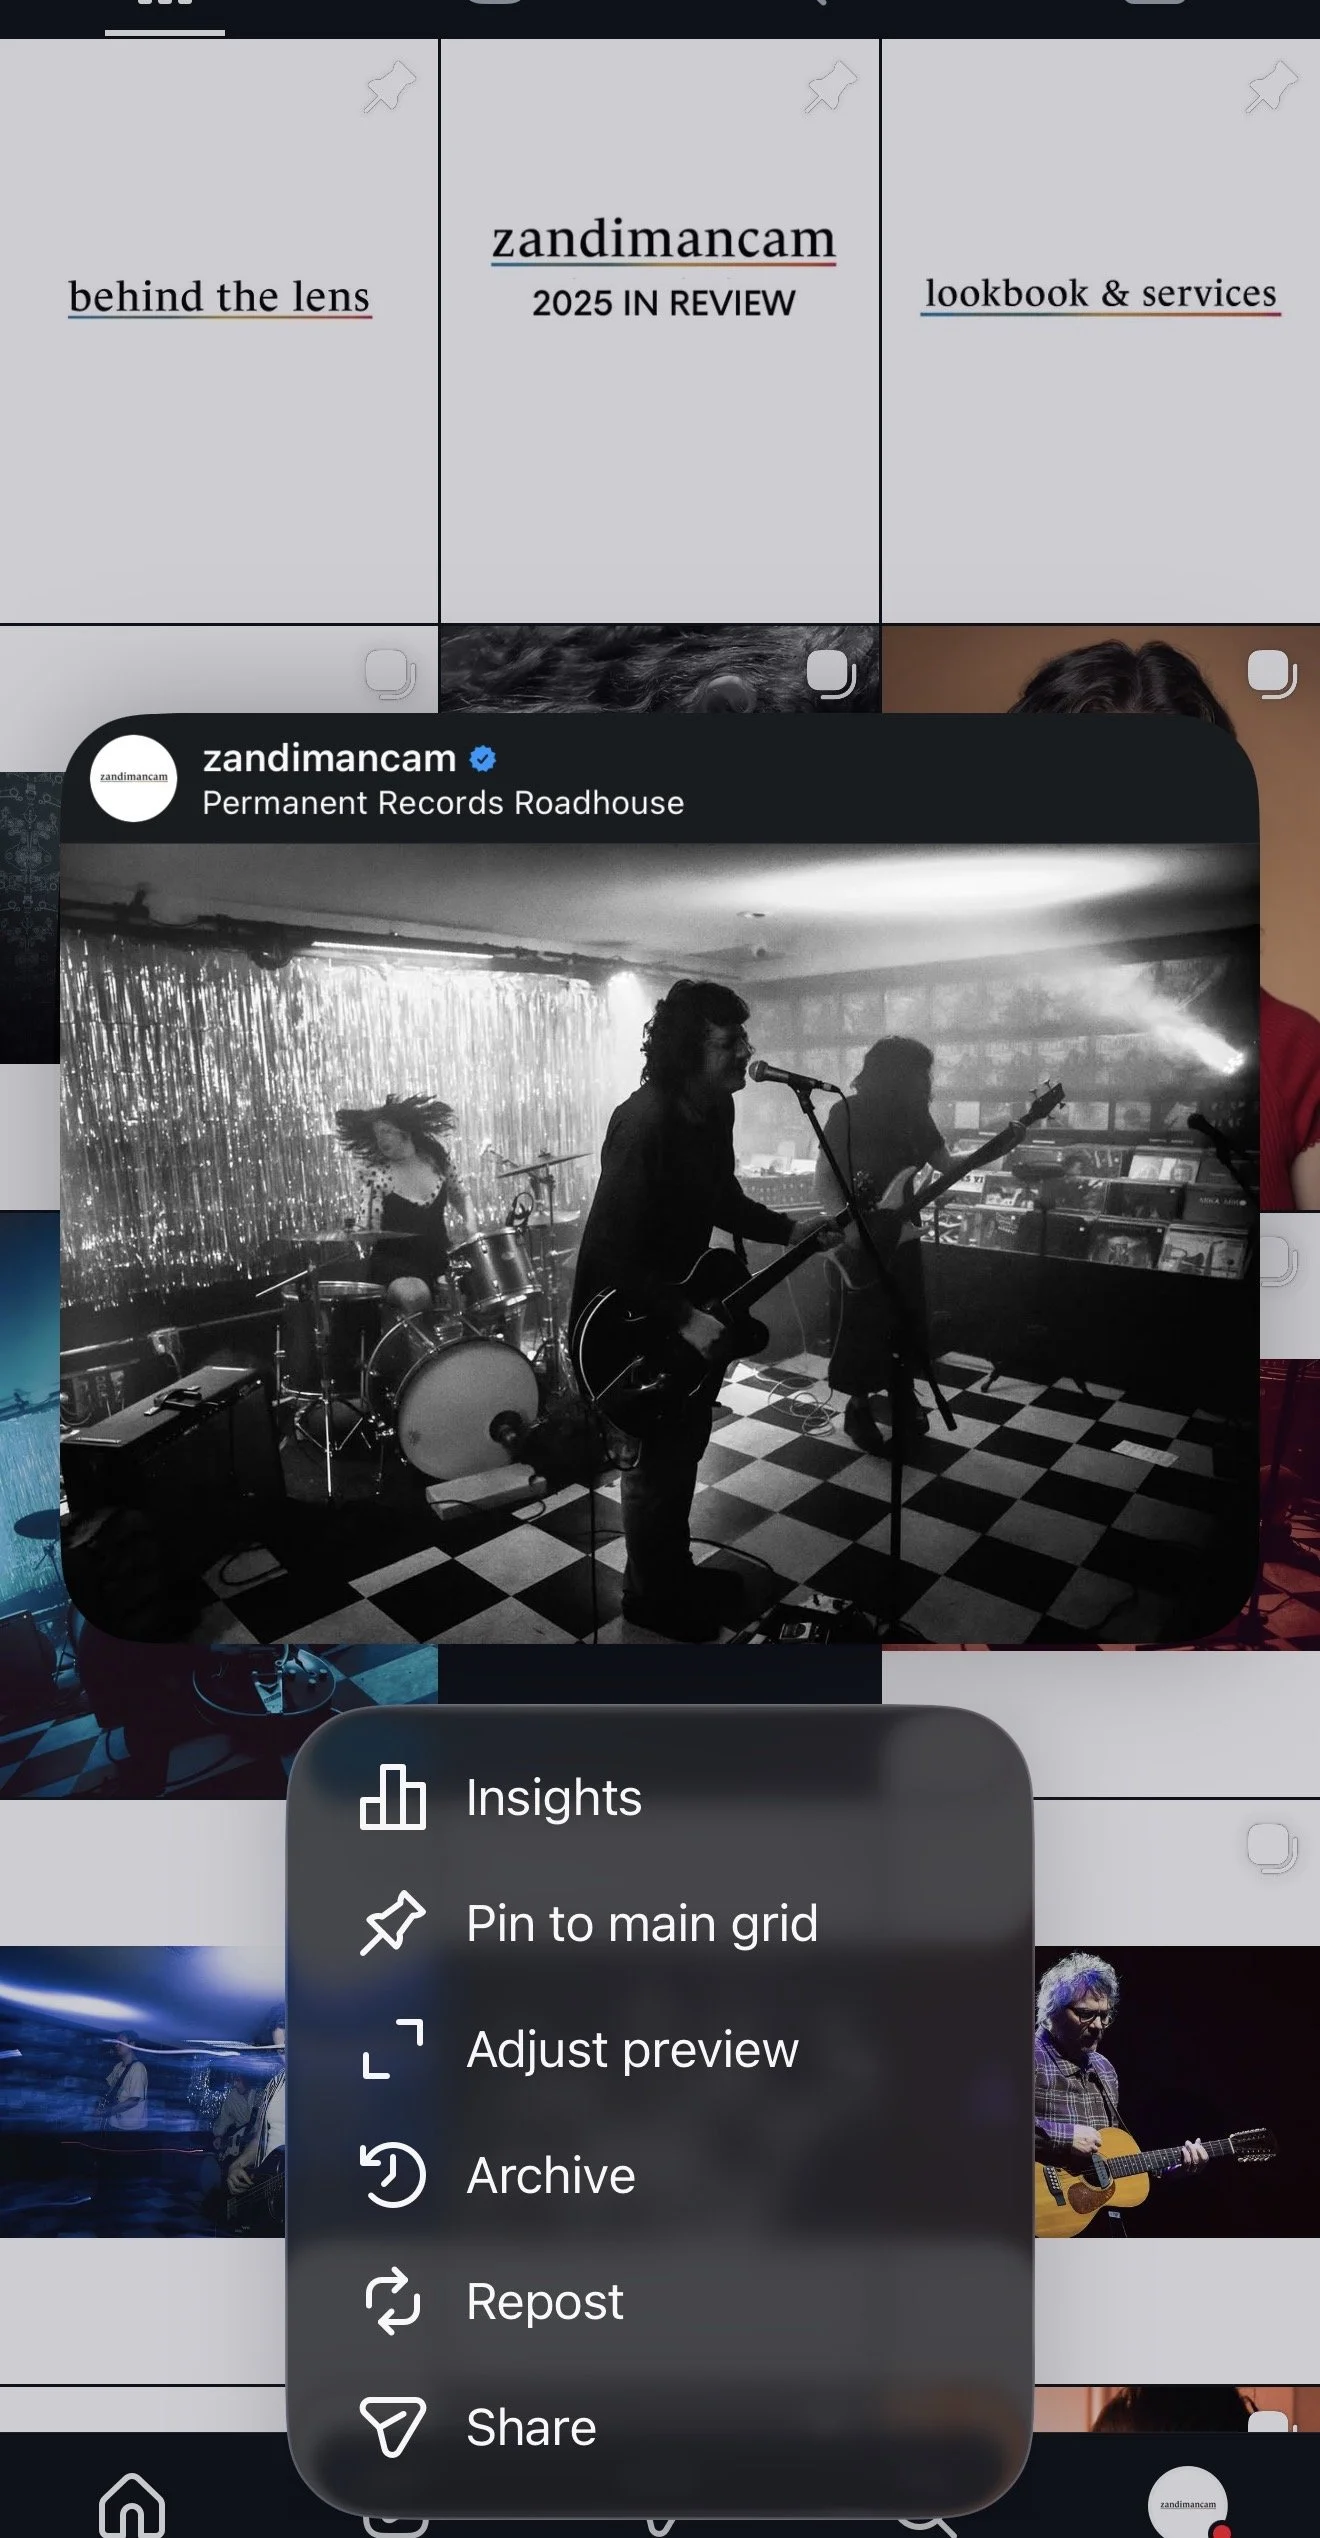
4. The Grid
For folks who obsess about their Grid like I do, here’s an easy hack to show landscape images on your profile:
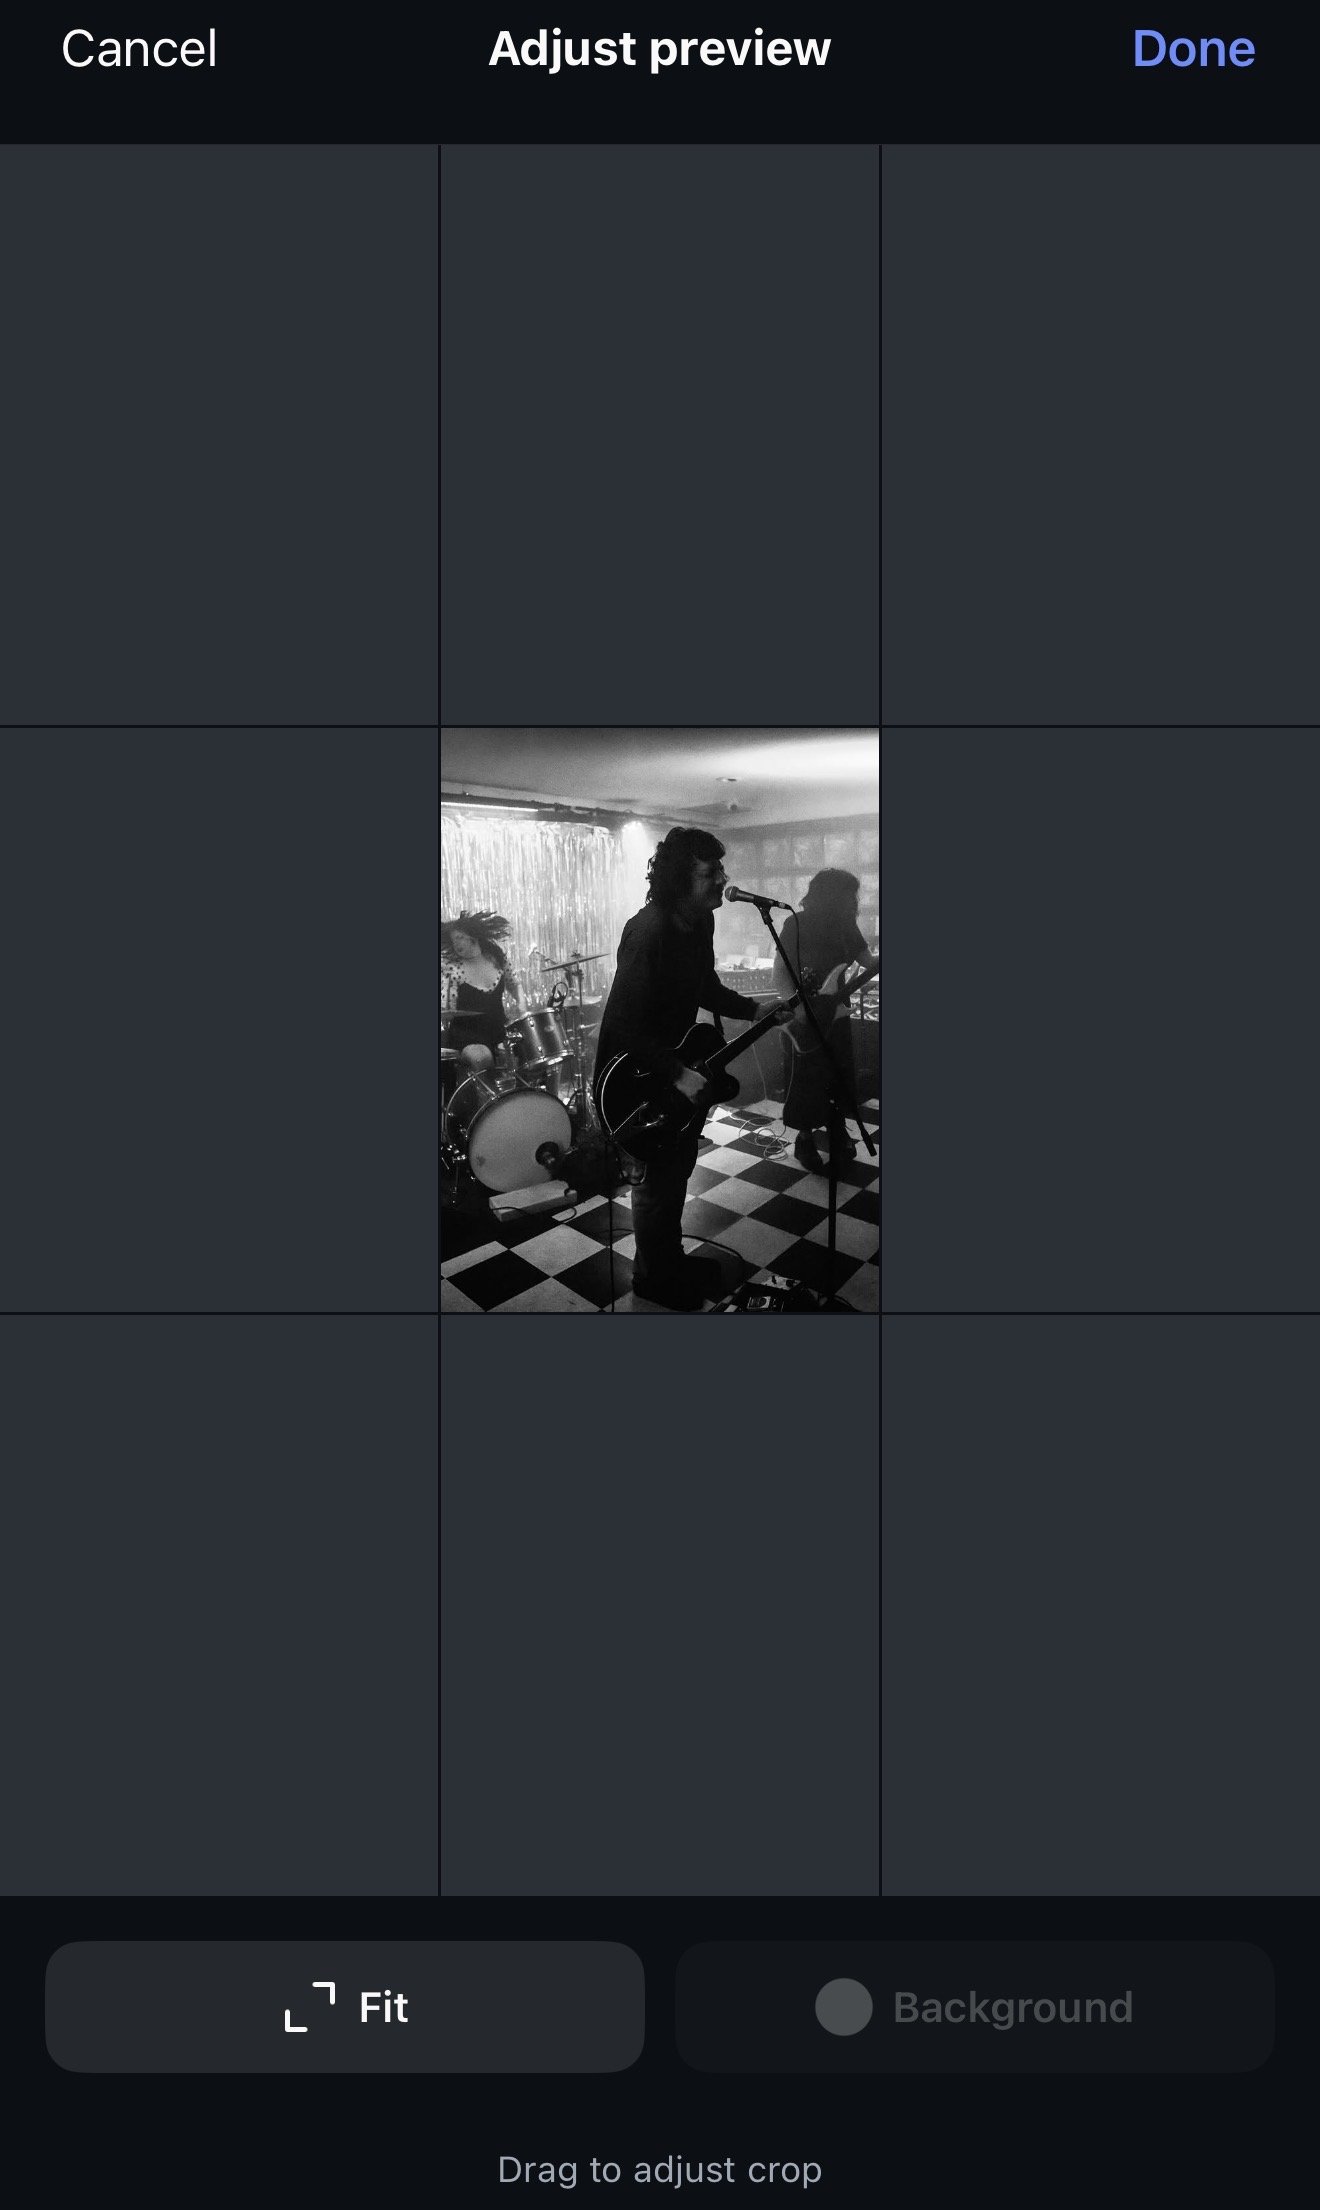
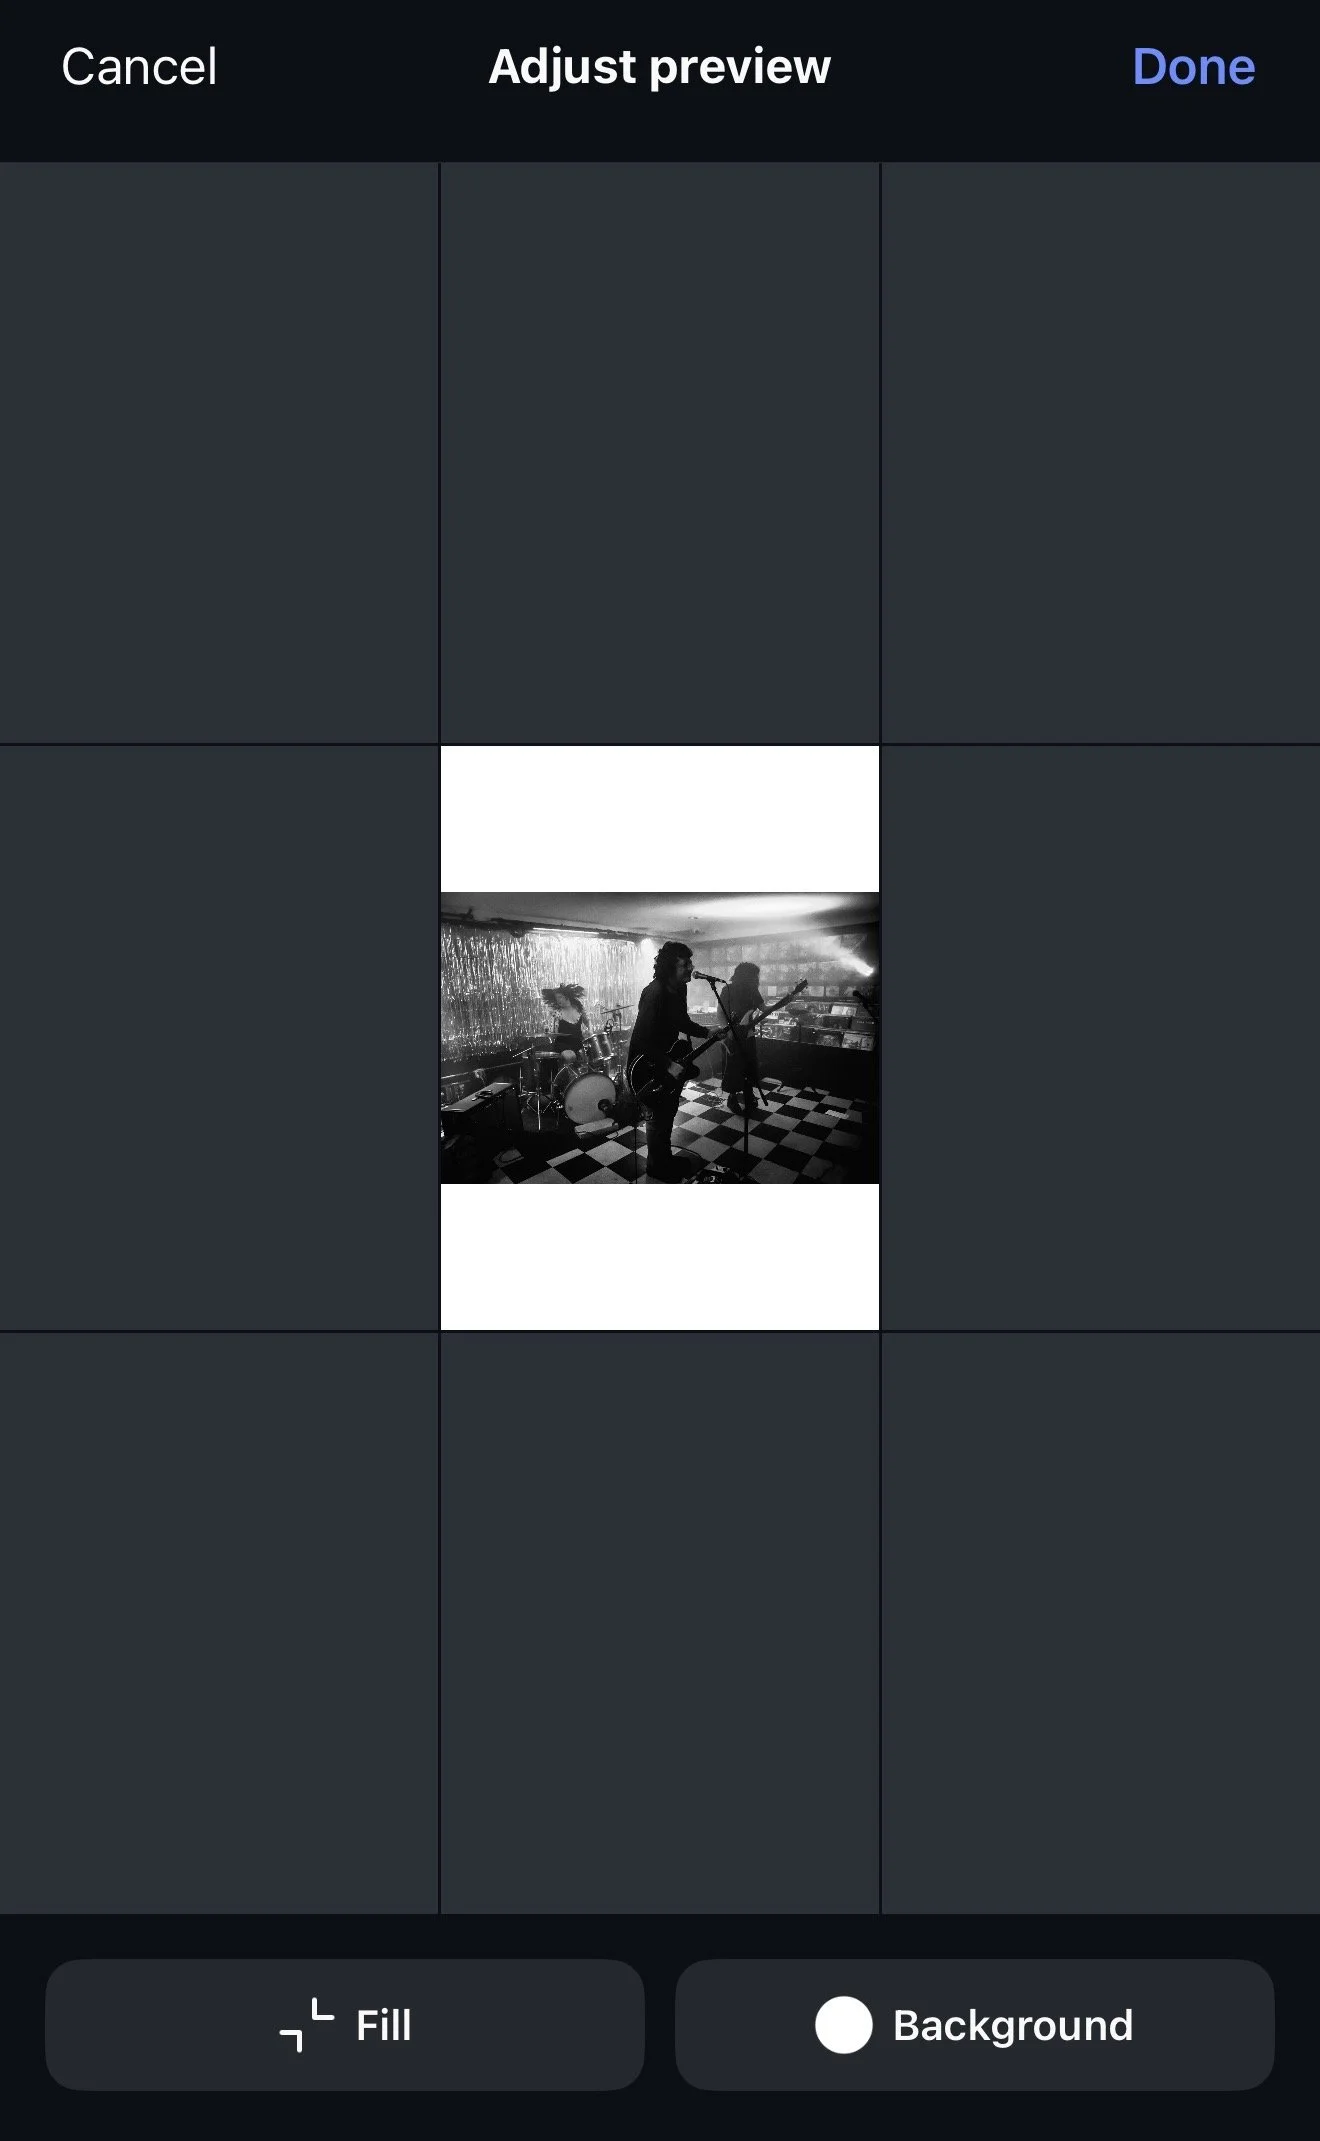
Adjust Preview: You can now long-press any post on your grid and select “Adjust Preview.” This lets you center the most important part of the photo or add a customized background color to fill gaps. No more manually adding white borders in third-party apps just to keep your grid organized.